Blink Data Overview
Blink Data is BlinkPay's Account Information API that provides secure access to customer-authorised financial data from major New Zealand banks through Open Banking.
What is Blink Data?
Blink Data allows businesses to access account information directly from customer bank accounts using the newest data access methods provided by participating banks. It integrates with data recipients and banks, enabling customers to use a modern consent process to share their financial data securely.
Customers can grant access to their account information, avoid traditional document-based verification processes, and obtain greater control over when, where, and how their data is shared.
Key Features
- Multi-Bank Aggregation - Single API for ANZ, ASB, BNZ, Westpac, Kiwibank and NZHL
- Real-Time Data - Near real-time access to account information
- No Screen Scraping - Official bank APIs only
- Customer-Authorised - Explicit consent required
- Secure - ISO 27001:2022 certified, encrypted data transmission
Architecture
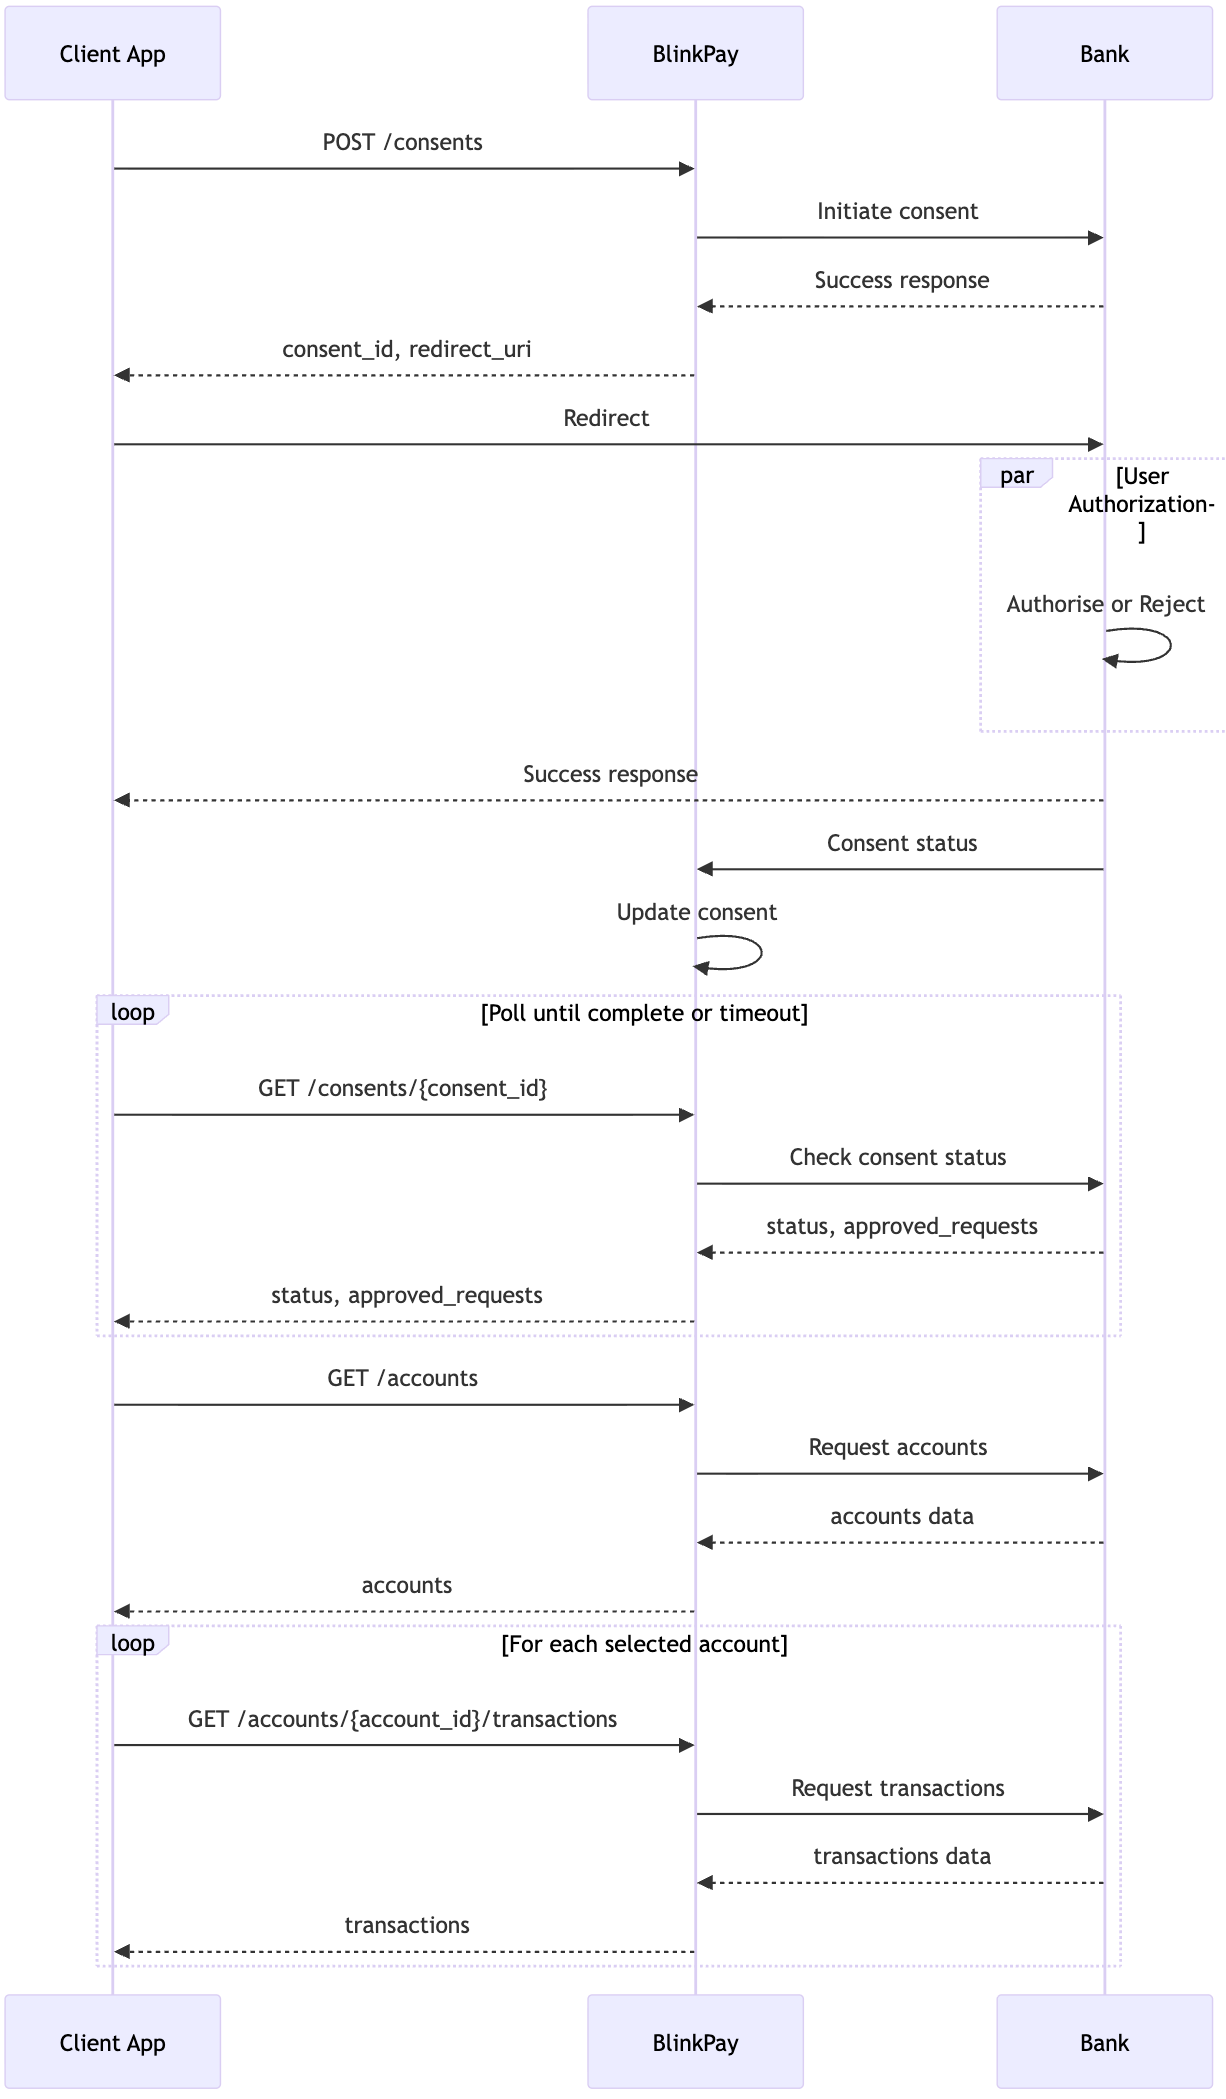
Blink Data operates as an aggregation layer between data recipients and banks:
Your Application ←→ Blink Data API ←→ Bank APIs ←→ Customer Accounts
Benefits of Aggregation
- Single Integration - Integrate once with BlinkPay instead of separately with each bank
- Stable API - Your code remains unchanged as banks upgrade their APIs
- Consistent Experience - Unified API across all banks
- Reduced Maintenance - BlinkPay handles bank-specific changes
Supported Banks
In production, Blink Data connects to ANZ, ASB, BNZ, Westpac, Kiwibank and NZHL. The sandbox has one test bank, PNZ. Every bank supports the redirect and decoupled flows and returns accounts, balances, transactions and party data; statements are available at some banks only. The per-bank table, including the bank values and decoupled identifiers, is on the Bank Coverage page. Blink Data has no payment limits; the limits on that page apply to Blink Payments.
Available Data
| Permission | Data Access |
|---|---|
ReadAccounts | Account numbers, names, types, currency |
ReadBalances | Current and available balances |
ReadTransactions | Transaction history with payee info |
ReadStatements | Account statements (availability varies, most banks support at least 2 years) |
ReadParty | Account holder name and contact details |
Bank Support Varies
Not all banks support all data types. Use the metadata endpoint (GET /v1/meta) to check feature availability.
How It Works
- Customer Initiates - Customer wants to connect their bank account
- Create Consent - Your application creates a data access consent
- Customer Authorises - Customer authenticates with their bank and approves access
- Access Data - Your application retrieves authorised account information
- Ongoing Access - Continue accessing data until consent expires or is revoked
Data Handling
Blink Data operates as an integration layer and does not hold customer Personally Identifiable Information for first-party use:
- Customer-Authorised - All data access requires explicit customer consent
- Time-Limited - Consents can carry an expiry date, and start and end dates that limit the data they cover
- Customer Control - Customers can revoke consent anytime through the same channel used to create it
Environment URLs
API paths sit under /v1; the token endpoint sits at the host root.
| Environment | Base URL | Token endpoint |
|---|---|---|
| Sandbox | https://sandbox.data.blinkpay.co.nz | POST https://sandbox.data.blinkpay.co.nz/oauth2/token |
| Production | https://data.blinkpay.co.nz | POST https://data.blinkpay.co.nz/oauth2/token |
Getting Started
- Get Credentials - Sign up at merchants.blinkpay.co.nz; sandbox credentials are under Settings > API Settings (see Getting API Credentials)
- Import Postman - Download from Postman workspace
- Generate Token - Use client credentials OAuth flow
- Test - Try
GET /v1/metato view available banks - Integrate - Implement consent flows and data retrieval
- Go Live - Select Upgrade to Production in the portal and, once approved, switch to production credentials (see Going Live)
Next Steps
- Quick Start Guide - Get started in minutes
- Data Retrieval - Complete API reference